|
Using the Computer to Make Material for Children's Bible Classes The computer has opened up a new world for Bible class teachers. No longer are we completely dependent on a purchased workbook series, often poorly done and unrewarding to look at compared to the other books most children are exposed to; but we can plan and create our own "workbooks," class materials, take-home papers, coloring pages and games. Pictures and clip art can be purchased as software, downloaded from the Internet, or scanned from a book or magazine. Image editing and illustration programs let us create our own pictures and clip art or adapt existing pictures. Publishing programs let us combine pictures and text into an attractive lesson or pamphlet, custom made for the needs of our students. Memory verses, attendance stickers, and game pieces can be made to carry out the theme of the quarter’s lessons.
Ways to Use the Computer The Lesson This may include a story in language suitable for the age of the class, questions to answer, a picture or two to illustrate the story, an appropriate puzzle or picture to color, the memory verse or another assignment for the next week, and perhaps a "reminder" picture to illustrate the memory verse.
Children learn better if they can see a picture. A good picture, to be used while the teacher is telling the story, can add a lot of background information that may help the child better able to grasp the meaning of the lesson. Placing a picture from each lesson on the bulletin board will help review past lessons. "Hands-on" Bible Characters Using Logos Bible Draw or Broderbund’s Click Art Christian Graphics, make clip art people to represent the characters in the lesson. Four or five, seven-inch tall characters can be printed horizontally on a sheet of paper or card stock. Laminate the printed paper, then cut out the characters. Add a piece of a magnet to the back if desired. Let the children use these characters to retell the story. The characters could also be scanned from a children’s Bible or from flannel board sets. Take-Home Papers, Homework Let the students and the parents know what is expected of them by sending home "assignments" appropriate to the age of the student. Make sure the parents know if they are expected to read the lesson to the child or to help the child learn his memory verse, find answers to questions, or complete an exercise. In-class Activities, Coloring Pictures Young children need to do more than to sit quietly in a class and listen to the teacher. An attractive, well-chosen puzzle, coloring picture or other activity can reinforce the lesson (but should be more than just "busy work.") Attendance Charts More than just a way to count the number of times a child has been in class, an attendance chart can be a growing review of the material that has been covered and a way for a child and his parents to see the progress being made. An attendance chart can be a collection of stickers representing memory verses learned, a map of the twelve tribes of Israel, pictures of the twelve apostles, etc. Game Pieces Customize familiar games with game boards and pieces designed for a particular series of lessons. Using Pre-Made Supplies Some of the supplies available in office supply stores than can be used in creative ways are: Business Cards Inkjet Business Card Stock can be purchased in quantities of 30 perforated sheets of ten cards each. Many software programs such as Microsoft Works and Microsoft Publisher have programs that allow you to print business cards. The programs are set up to make all the cards alike, but in Microsoft Publisher, it is not difficult to make a template so that one can design a page of ten different cards. These cards can be used for:
JigSaw Puzzles I tried using the scrapbook accessory Coluzzle to cut out my own, but the paper I used was too flimsy to stay put and that drove the students nuts. Iron-on puzzle kits for ink jet printers work ok if you don't have a lot of solid color in the print out. If you do, the cut marks stretches and shows white, adding white lines through -out the design. The best for printing on an ink jet printer is the magnetic sheets that you then can trace a puzzle design on the back and cut out with scissors. Although thin, the pieces stay in place on a white board or cookie sheet, because they're magnetic. See more about magnets below. Magnets If you don't want to get the magnetic sheets, scan a picture & print it, or print a clip-art picture appropriate to the lesson, page size on the business card stock. Tear it into the separate cards, back them with small magnets, and use as a jig-saw puzzle. Hand a different one to each child, if desired & have them put it together and tell the story. Books of the Bible: I have made flash cards for the books of the Bible to print on business card sized magnets and use on a metal surface to help children learn the books of the Bible. Stickers Mailing labels come in all shapes and sizes. I find the most useful to be sheets of the 2"x4" mailing labels and the 3"x3" diskette labels. Clip art can be sized to fit on these labels and either cut to shape or used as is for attendance charts, to complete pictures, for matching exercises, or other classroom activities. I also make colorful name tags at the beginning of each quarter for the students to put on their notebooks and attendance charts. Clip Art
Copyrights As you download pictures or scan pictures or text for use in your class, remember that the artists, authors, or publishers hold the copyrights to these items. It is our responsibility to find out to what extent we can use their work in the materials we make for our classes. Most providers allow you to use a picture for your own personal use, which would cover most instances of classroom use. (Although they may place a limit on the number of pieces of clip art from a collection you can use in one publication, or the number of copies you can make.) Many will not allow you to sell the art, or anything made using the art. The most liberal will allow you to use it in any way you want with the exception of including it in a collection of clip art to sell. Some Internet sources allow you to use the clip art you get from their site only as long as you are a subscriber. Read the copyright information provided with the software or on the website. If in doubt, write or email the publisher/artist/author. Get an answer in writing. Miscellaneous Use a program such as Microsoft Publisher to make greeting cards to send to students who are absent or having a birthday. At the beginning of each quarter, send an invitation to the students who will be in the class. These could be made of paper folded in fourths, of special greeting card stock or of regular card stock (white or color) cut in fourths and sent as post cards. Make attendance charts that follow the lesson.
A List of Useful Products The Basics:
Nice to Have:
Books: See Suggested Links for book suggestions.
Supplies: Most of these supplies are available at office supply stores.
Yes, some of these materials are expensive; but these are only ideas to give you a starting point. Children are accustomed to bright, cheerful, good quality reading materials and games at home and school and will reflect the importance we assign to their Bible class materials. Fay Phillips |
 Full-Sized
Pictures
Full-Sized
Pictures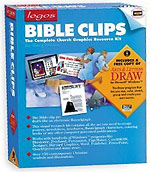 The
best clip-art program I have found is by
Logos. It is called
Bible Clips and has pictures that can be used in any
size, figures and objects that can be combined into new
pictures, and can be used in full color for complete
pictures or for flannel board figures, or in black and
white for pictures to color. It comes with a graphics
program and the clip art is vector art, that can be
resized without loss of quality. (The files come in the
proprietary .GED format as well as exporting to .WMF and
.CDR formats.) I find I use it a lot. It comes with a
manual which shows all the figures and objects
available. It is no longer being published, but you may find resale copies online.
The
best clip-art program I have found is by
Logos. It is called
Bible Clips and has pictures that can be used in any
size, figures and objects that can be combined into new
pictures, and can be used in full color for complete
pictures or for flannel board figures, or in black and
white for pictures to color. It comes with a graphics
program and the clip art is vector art, that can be
resized without loss of quality. (The files come in the
proprietary .GED format as well as exporting to .WMF and
.CDR formats.) I find I use it a lot. It comes with a
manual which shows all the figures and objects
available. It is no longer being published, but you may find resale copies online.| Related Pages |
|
|